Installation Instructions
In PinkNotes Plus there are two pieces of software. The PNP Master (which is the server side of the software) and the PNP Client. Only one computer on your network needs to have the PNP Master installed on it. On the rest of the computers, that you would like to be able to send and receive PinkNotes from, just install the PNP Client. If needed, you can install both the PNP Master and a Client on the same machine.
PinkNotes Plus Master – Installation Instructions
- Go to the machine that you would like to setup with the PinkNotes Plus Master software.
- Download and locate the installation file name 'pnp470d3.exe'.
- Double-click on the installation file to begin.
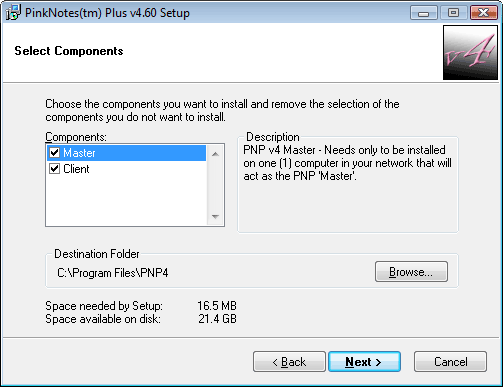
- Follow the instructions in the installation wizard. The main option you need to specify is what you would like to install. Make sure you place a check mark next to "Master" (and "Client" if you would like both on this computer).

- When the installation is done the PNP Master will startup automatically.
- The first time the PNP Master starts up it will display the welcome screen. In the welcome screen you will be shown the address you need to use to connect the PNP Clients to this machine. Make sure you make a not of this address.
NOTE: when the PNP Master starts up for the first time you may be prompted by your software firewall that a new program it trying to communicate on your network. Make sure that you select to unblock the PinkNotes Plus Master or you will not be able to connect any PNP Clients to it.
If you are not prompted by Windows asking if you would like to allow the PNP Master to communicate on your network and your Windows Firewall is on, you will probably need to manually add an exception into the Windows Firewall settings. Click here for instructions on how to add the PNP Master into the list of programs that can pass through your Windows Firewall.
PinkNotes Plus Client – Installation Instructions
- Go to a machine that you would like to setup with a PinkNotes Plus Client.
- Locate the installation file 'pnp470d3.exe' and double-click on it to start the installation wizard.
- When the Client installation is complete you will see the PNP Client login screen open up.

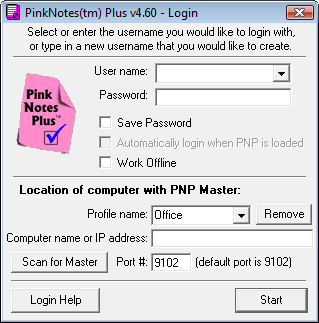
- Type in the username that you would like to use with PinkNotes Plus. You can use any name you would like.
- Type in the address of your PNP Master in the "Computer name or IP address" field and then click the Start button. If you are not sure what the address is of your PNP Master and you are on the same network as the PNP Master you can click the "Scan for Master" button to try and automatically find the Master address.
- The first time you connect a new user to the PNP Master you will be asked if you would like to create that new username. Say 'Yes' to that and you will then be asked if you would like to use a password or not. Passwords are not required.
NOTE: The first user that you connect to your PNP Master will be setup as your PNP Administrator. This is the user who will be access and change any settings on the PNP Master form any PNP Client they are logged in from.
Follow these same steps on any other computers that you would like to setup with the PinkNotes Plus Client.
To get the installation file for PinkNotes Plus onto all of your computers you can either put the installation file in a shared folder on your network that all your computers can access or you can download the Client only installation file as many times as you would like for each machine.
The Client only installation file can be download from:
http://dl.alphamedia.net/pnp/pnp470c.exe (~5 MB)
If you have any questions about the installation process please feel free to contact us or take a look at the manual for PinkNotes Plus.

|